Setting up process server deployment environment
Detailed below are the step by step instructions to install and configure IBM BPM 8.5.6 on windows environment,
Download the following eAssemlbly
eAssembly
|
Image
|
Description
|
CRVC2ML

|
CN4RXML
|
IBM Business Process Manager Advanced V8.5.6 Quick Start Guide
|
CN4RUML
CN4RVML
CN4RWML
|
IBM Business Process Manager Advanced V8.5.6 for Windows, 64-bit, Multilingual
Make sure that you download all of the images and extract them to the same location.
Includes:
IBM Business Process Manager Advanced Version 8.5.6
IBM WebSphere Application Server Network Deployment V8.5.5 Fix Pack 5
IBM DB2 Express V10.1.0 Fix Pack 1
|
eAssembly contains the following 3 zip archives
BPM_Adv_V856_Windows_1_of_3.zip
BPM_Adv_V856_Windows_2_of_3.zip
BPM_Adv_V856_Windows_3_of_3.zip
|
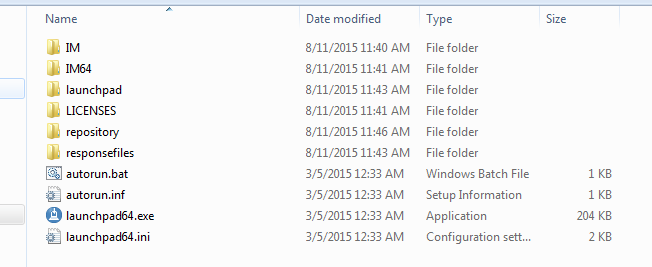
Unzip all 3 zip archives to the same folder, unzipped archive will look like as shown below
Visit the following software product compatibility report portal to determine compatibility among operation system and BPM version and to find the detailed system requirements
BPM 856 will be installed on windows 7 enterprise editions, pasted below is the hardware requirements tab
Make sure your system meet the hardware requirement as detailed below
Report will have other tabs which will have details about supported windows operating systems, Hypervisors, Prerequisites, Supported software, Hardware, Packaging list
Outlined below is the path we'll follow to setup IBM BPM Process Server Deployment environment
Custom installation of IBM BPM
Make sure you have administrator privileges and Start the installation by clicking on 'launchpad64.exe' using option Run as Administrator
Choose custom installation
Make sure you select check box 'install as administrative user'
Click on install button
Upon clicking install button installation manager getting launched
And showing the list of packages will be installed
Click on Next
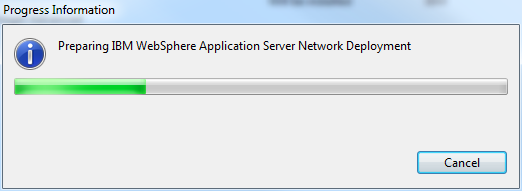
Upon clicking Next button, installation manager validates the prerequisites and preparing the OS for installation
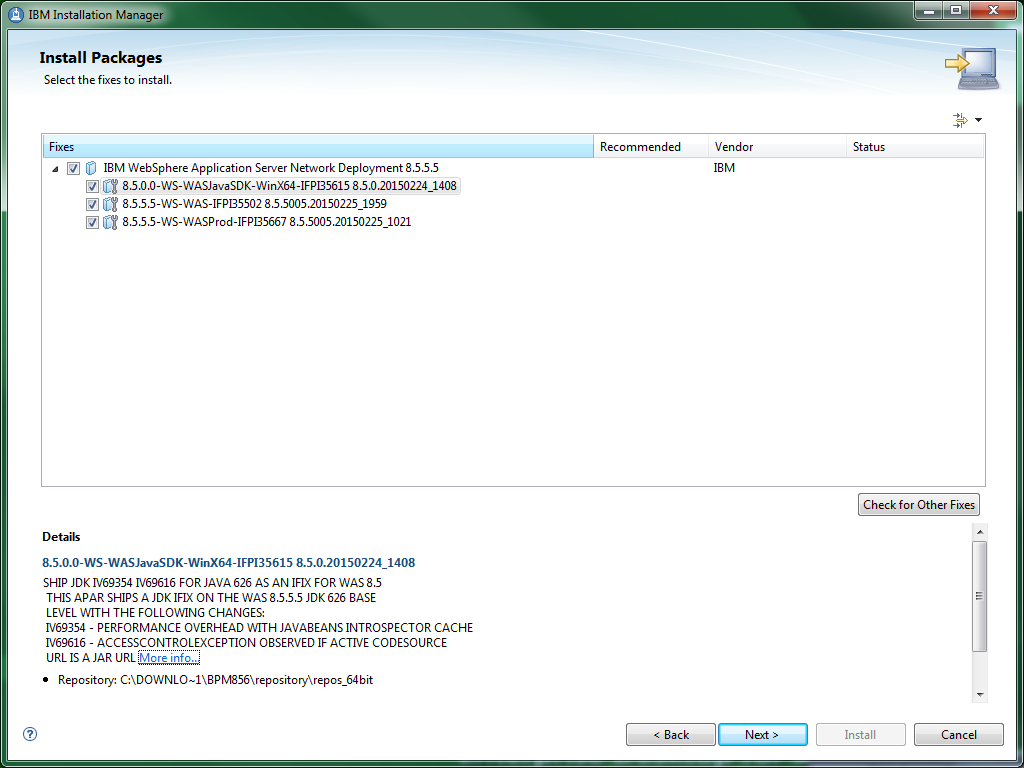
Further it'll list the fixes/packages that will be installed along with WAS ND
Click on Next and accept the license as we do always
Click on Next button and customize the installation directory as you like
Here I've chosen to install in C:\BPM directory
Select the translation as you need but the downloaded eAssembly should have the language specific files
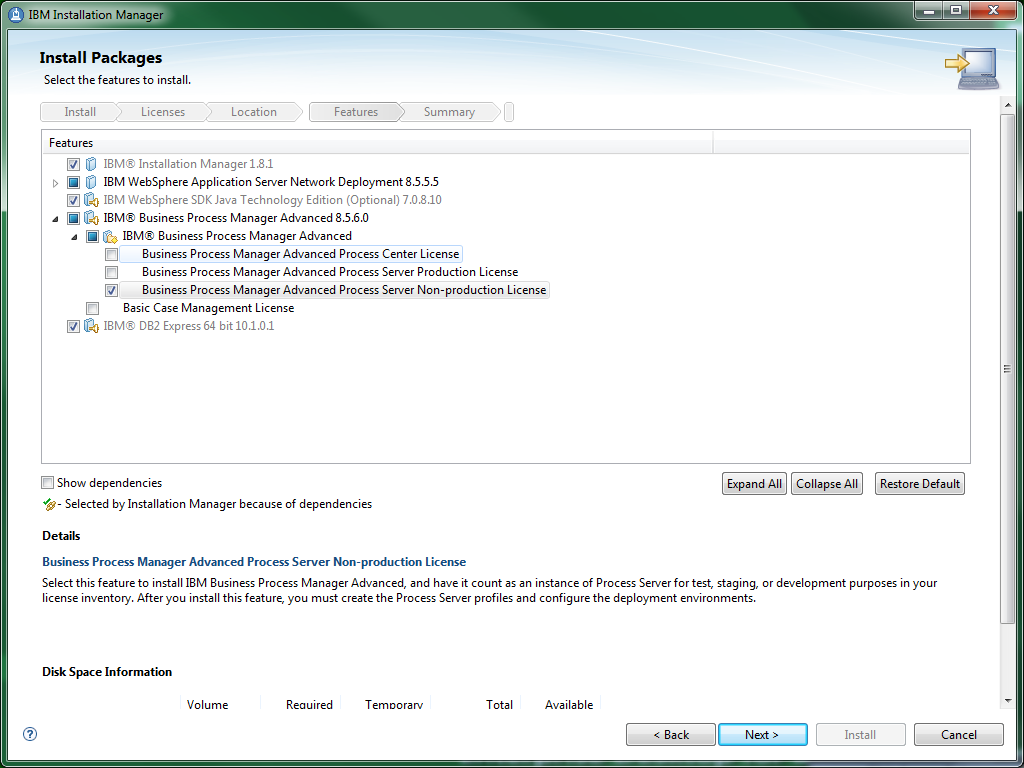
Click on next button to validate the features selected to install
Here I've chosen to install Business Process Manager Advanced Process Server Non-production License
Click on Next
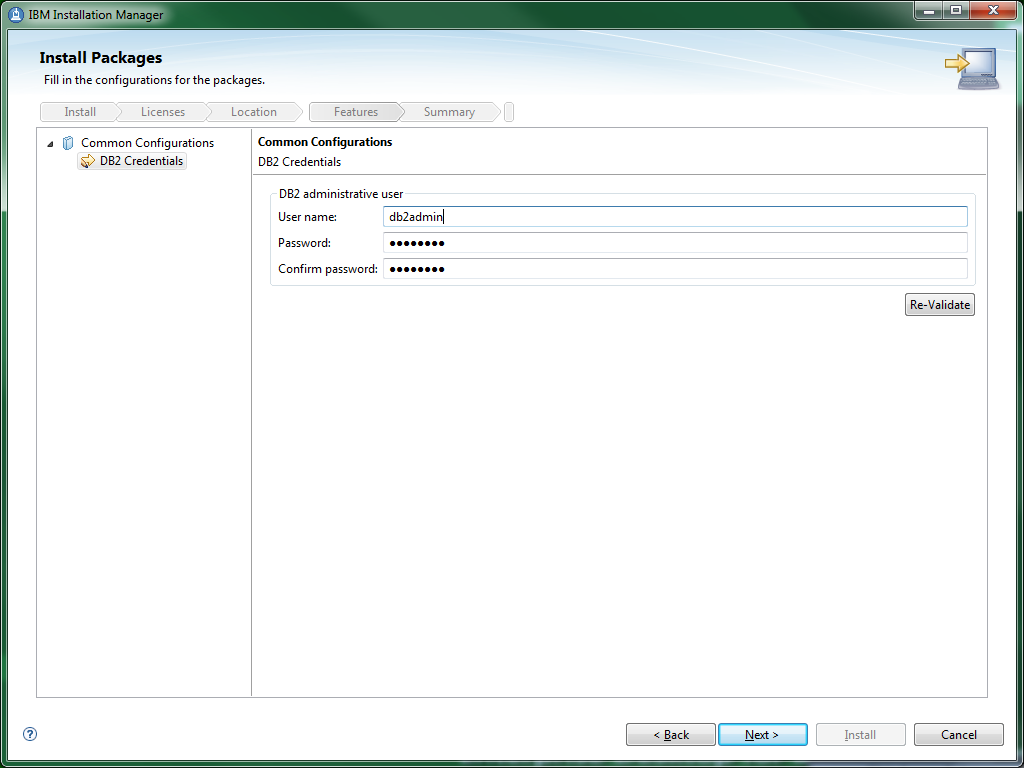
Enter DB2 administrative user account and password
Click on Next, to list the components will be installed
Click to install
Installation begin
Installation completed and choose None ratio button to close the IM window
Configuring the process server deployment environment using BPM Configuration editor
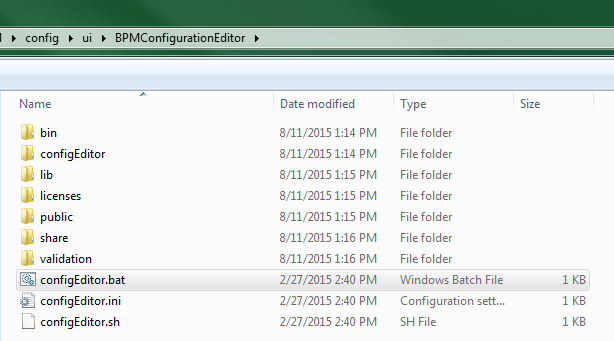
BPM Configuration editor is located at 'C:\BPM\BPM\config\ui', here "C:\BPM" is the bpm installation folder
Unzip the BPMConfigurationEditor.zip
Open the 'configEditor.ini and enter 'JAVA_HOME' location as shown below
Run the 'configEditor.bat' as administrator from command window
BPM Configuration editor opens in browser window as shown below
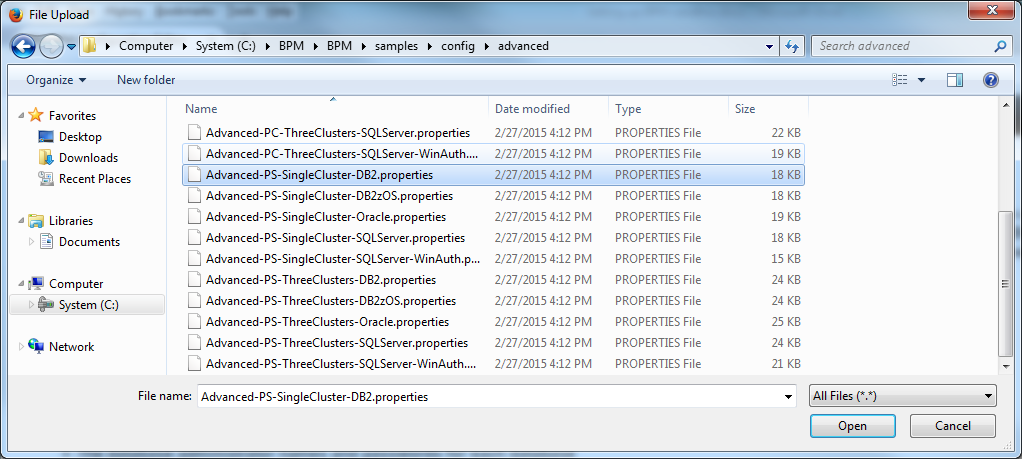
Click on browse button to locate the sample property file
Highlight the ' Advanced-PS-SingleCluster-DB2.properties' and open it
Then click on 'Open Editor' button
Click Open Editor to launch the editor and configure the environment.
Editor open it up in Browser
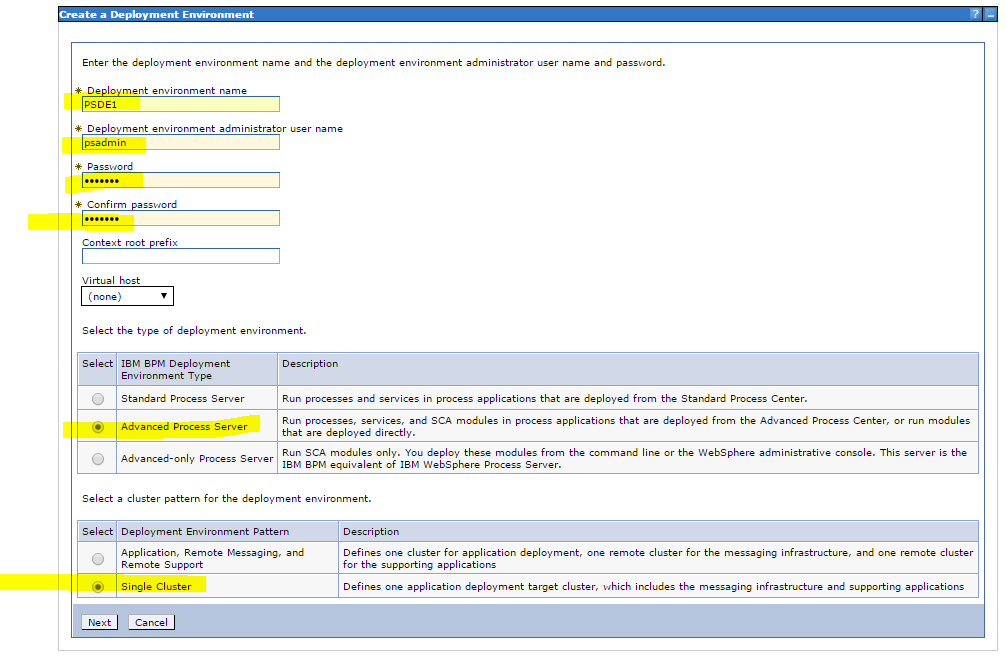
Enter common database details and click on Finish button on top right corner of the window
Enter authentication alias shown below
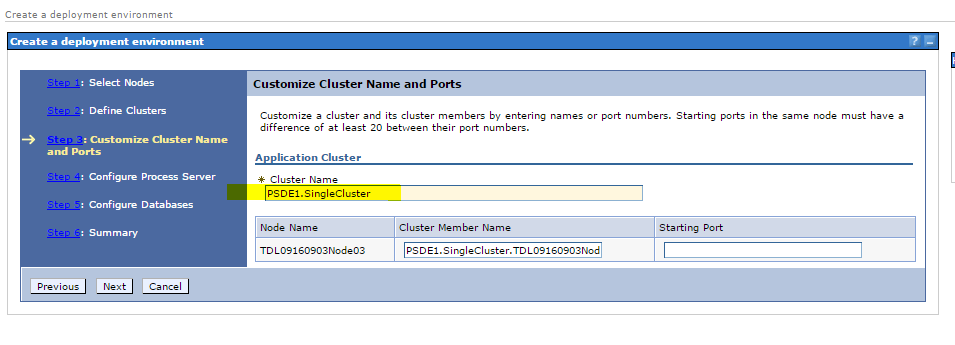
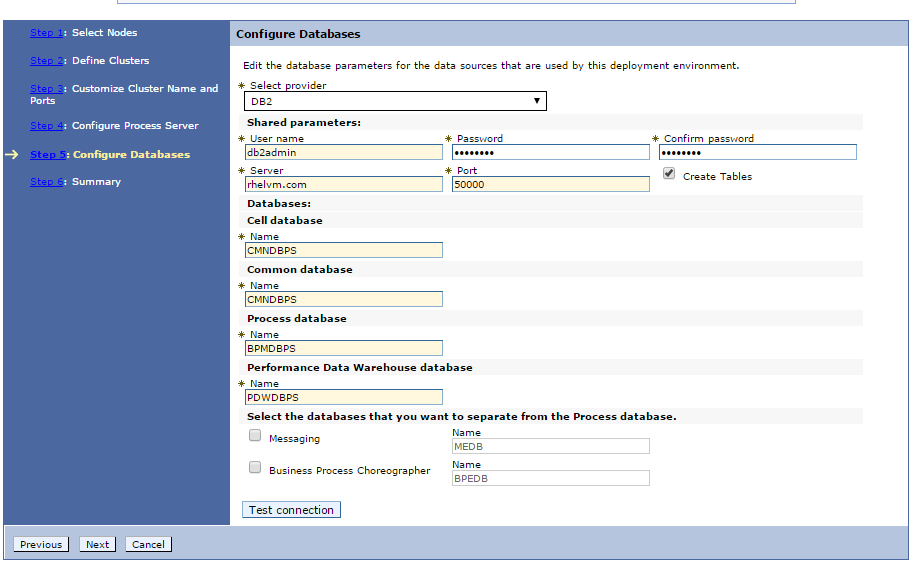
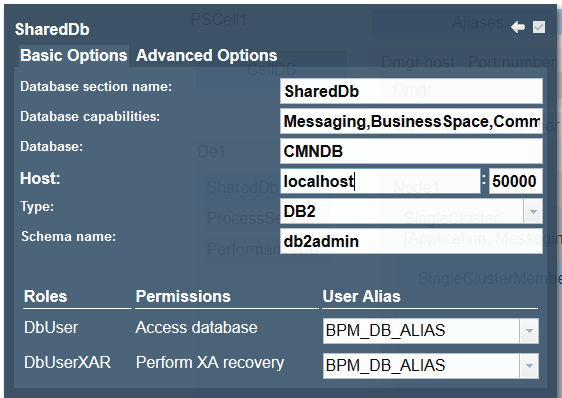
Enter shared database details as shown below
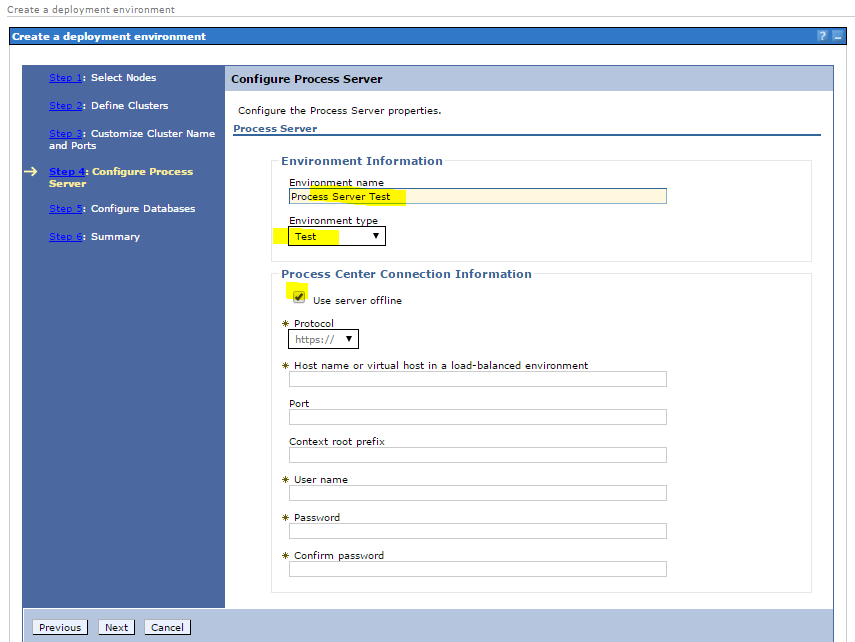
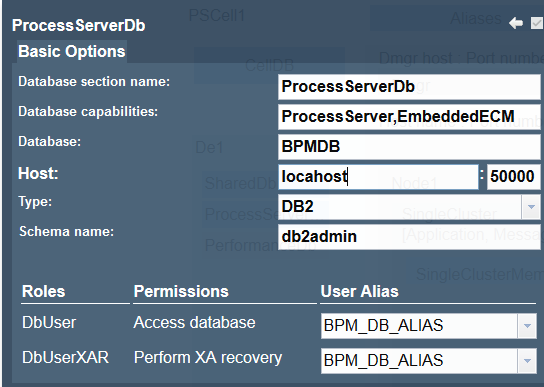
Enter process server database details as shown below
Enter performance server database details as shown below
Enter Deployment manager details as shown below
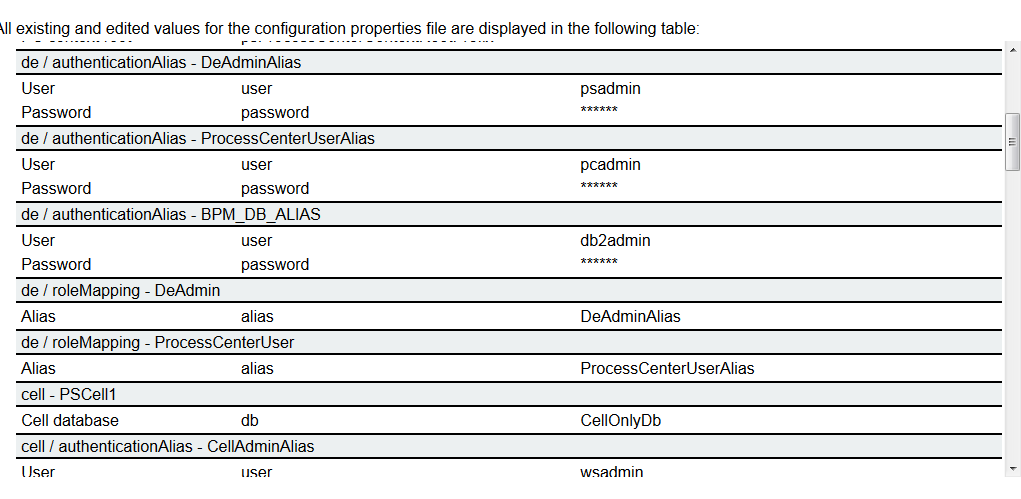
Click on summary to list of properties configured
Click on save button to save this file at local directory
File has been saved to local directory
Create SQL statements to generate database
Using BPMConfig utility and the property file we modified using BPM Configuration editor, SQL statements generated to create databases as shown below
BPMConfig command line utility located at bin directory of \BPM_INSTALLATION_ROOT\'
Scripts were generated and stored under C:\BPM\BPM\mydbscripts
As you see there are two set of scripts; one for cell scope and one for deployment environment
Scripts to create common database found under cell scope as well as deployment environment scope
Running any one of the common database scripts is succificient
Run Script to generate Databases
Type the below command in run window to launch windows command prompt as 'db2admin'
runas /noprofile /user:db2admin cmd
|
Remember the SQL scripts to generate databases need to be run under db2admin
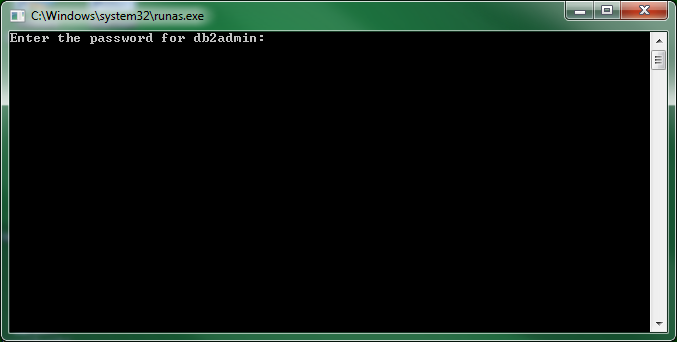
You will be asked to enter the password for user db2admin
Enter the password same as the one we provide when DB2 was installed using installation manager
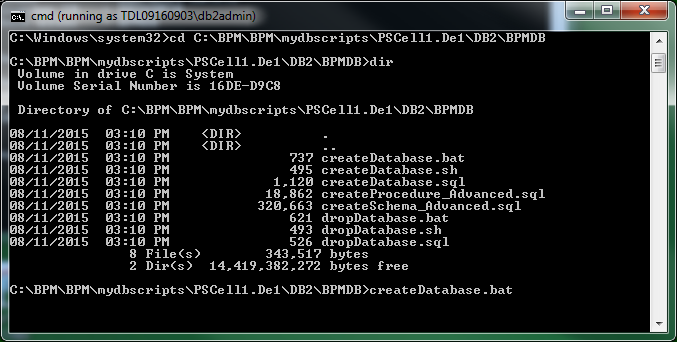
Now the command window runs under user db2admin
Change directory to where the DB scripts are stored and run the createDatabase.bat file to generate the BPMDB database
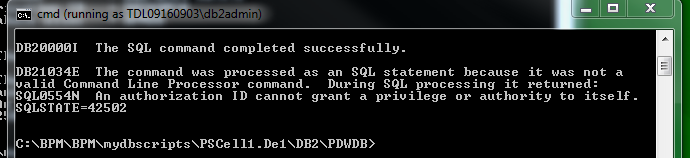
Batch file create the database
Ignore the DB21034E error, here we're trying to provide authority db2 root user account, hence it's throwing the error.
Note: db2 installation was owned by db2admin and we're using same user account for creating databased for bpm process server deployment environment
Same as run the scripts for CMND and PDWDB
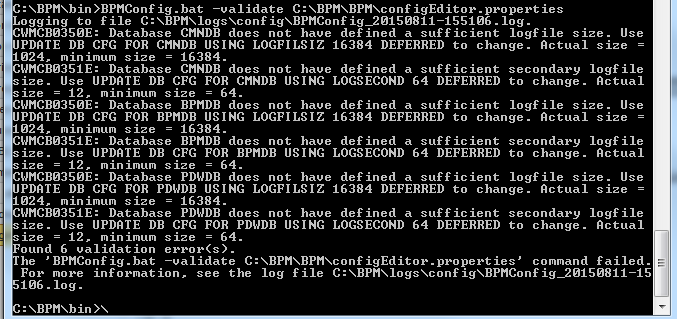
Now with databases created, validate the property file using BPMConfig command line utility
One possible reason could be the batch file used to create database may exit prematurely without completing this statement hence it was failed with DB21034E error code
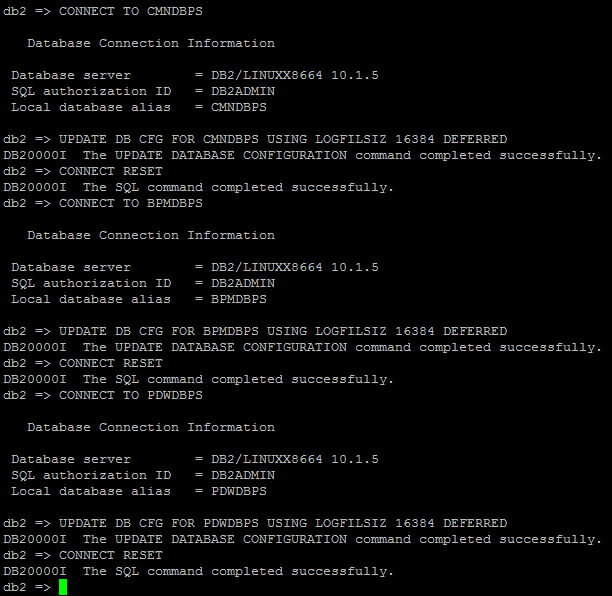
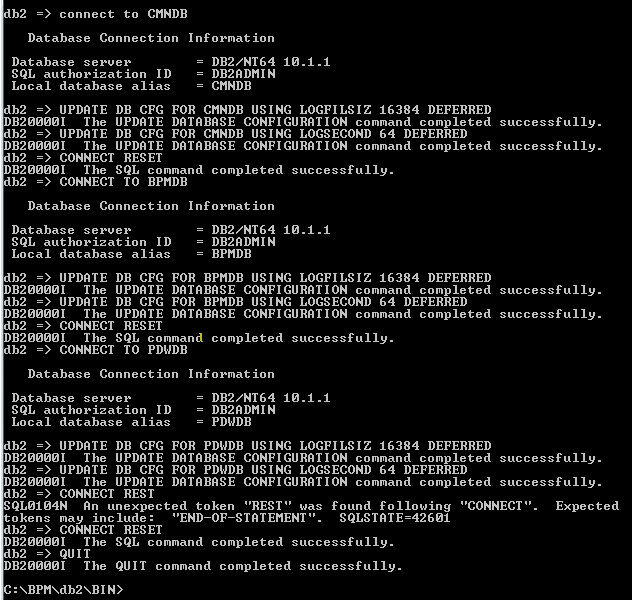
We'll run these SQL statements separately and validate it again
Launch command windows as user db2 admin using command ' runas /noprofile /user:db2admin cmd' on run window
Navigate to bin directory where DB2 got installed and launch db2 command line processor
And run the SQL statement as shown below
We'll validate the property file using BPMConfig utility again
This time the validation passed successfully
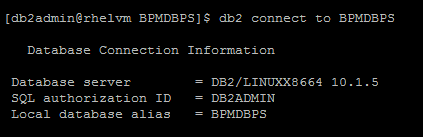
Let's validate the database connection using BPMConfig
DB2 validation successful
Creating Deployment Environment using BPMConfig utility
Now we'll run the BPMConfig utility to create process server deployment environment
Starting the deployment environment
Quick start short cut option available to start the DE
Upon clicking De1 Quick Start option , you will get the following windows
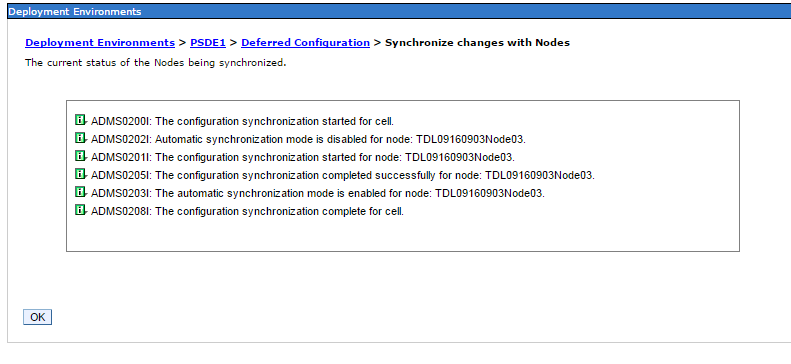
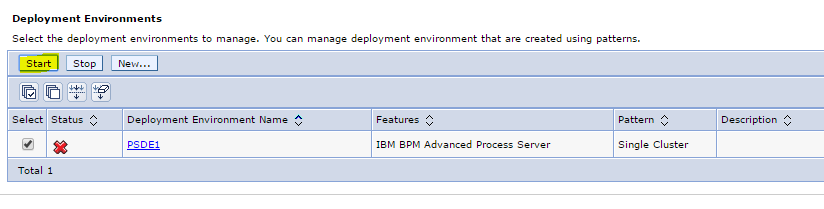
Click on start the process server deployment environment
Deployment environment started successfully
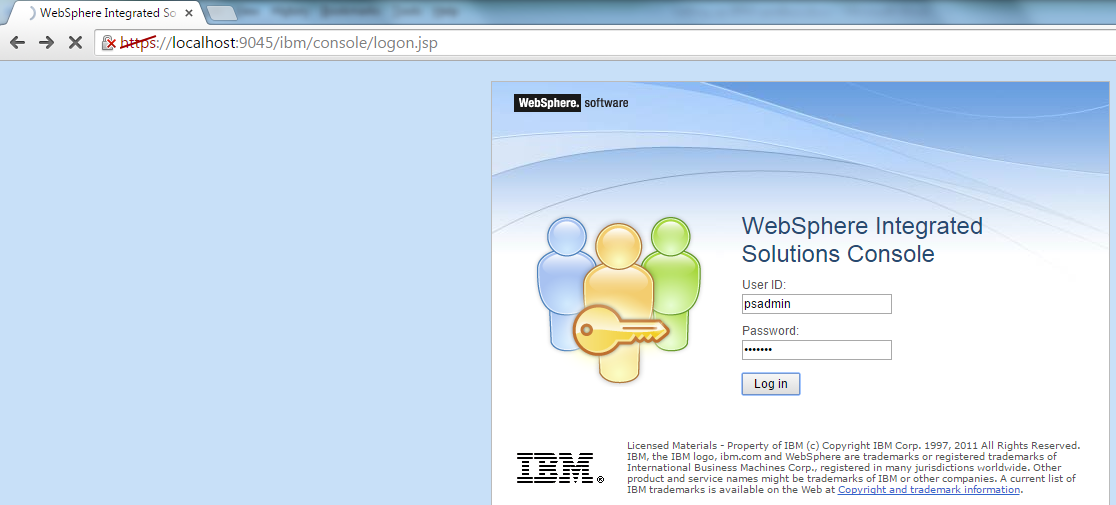
Let's login to deployment manager
WAS and BPM version on the home page
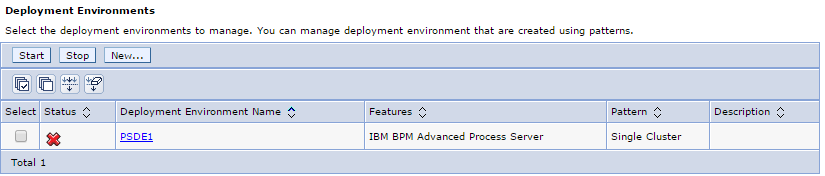
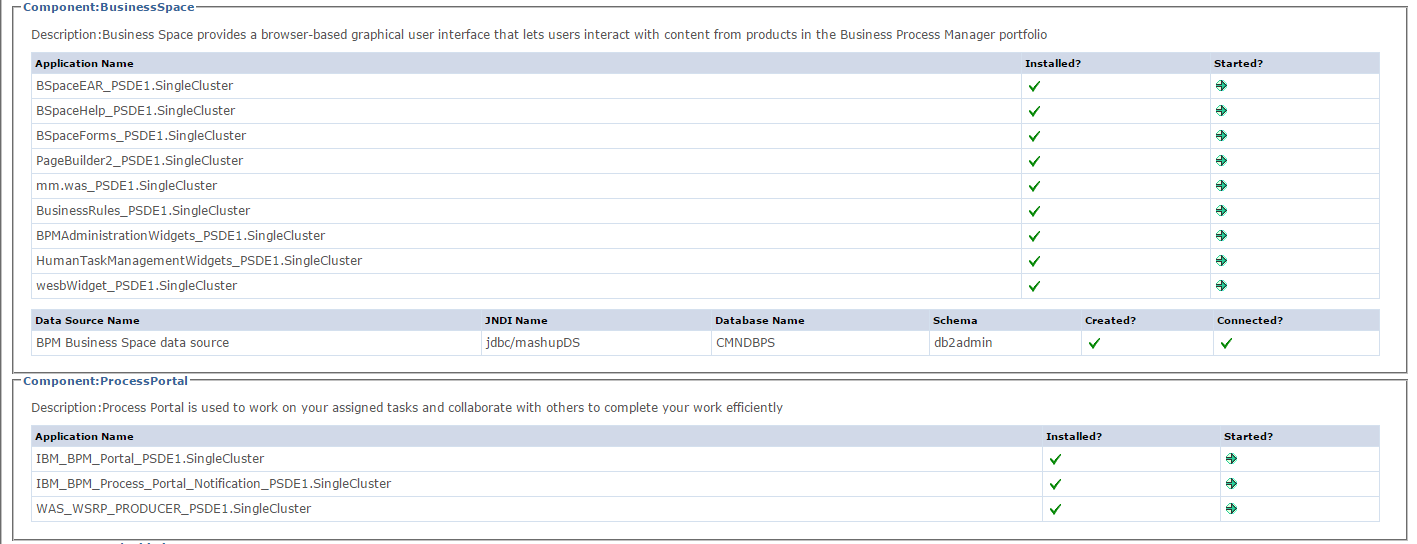
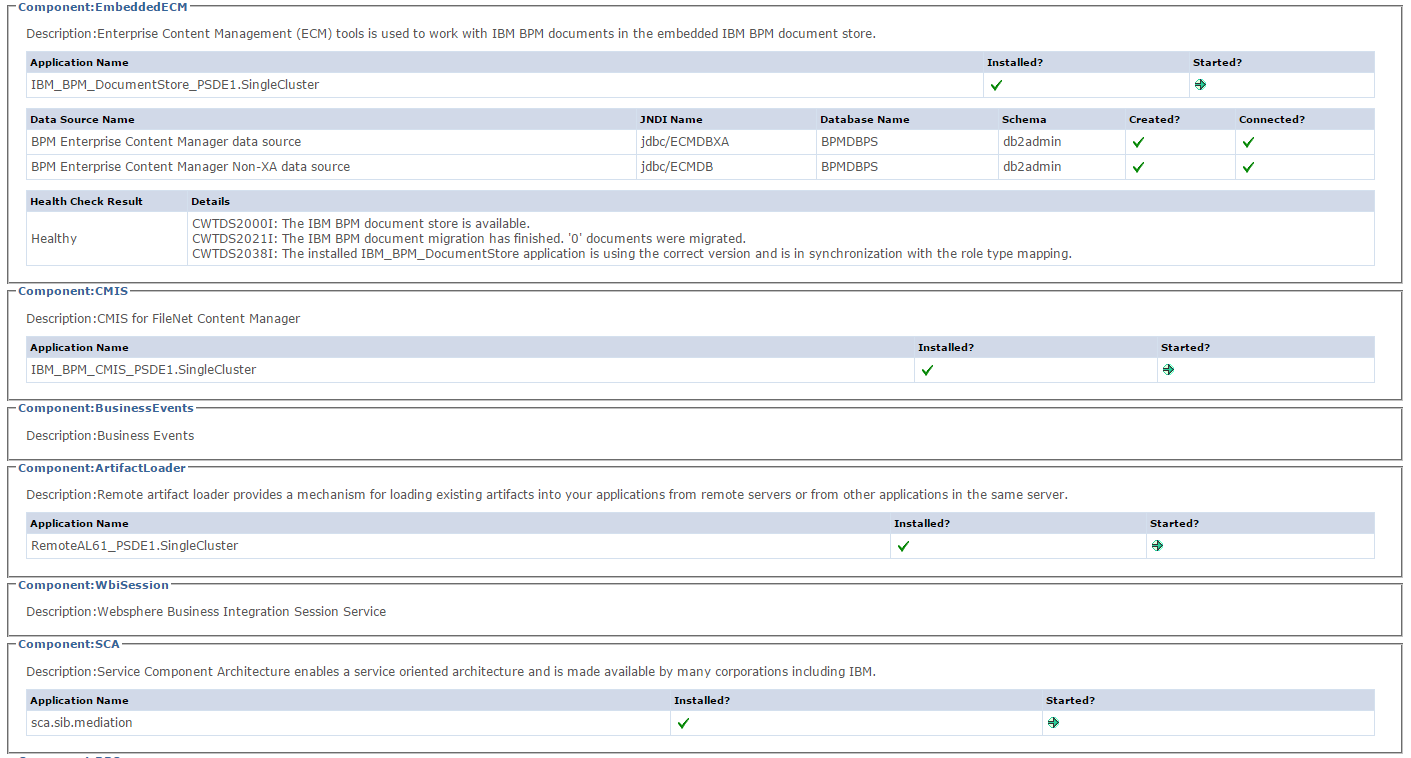
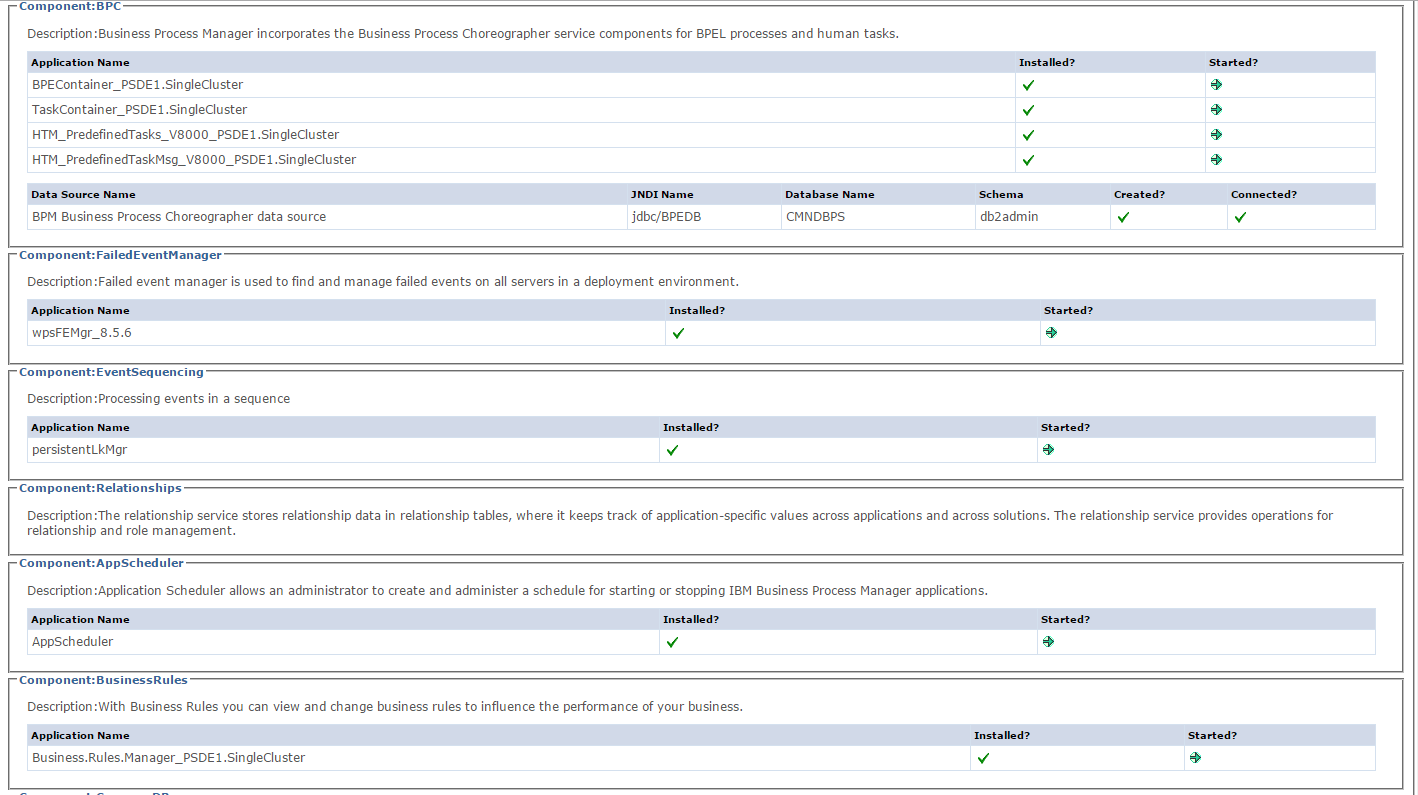
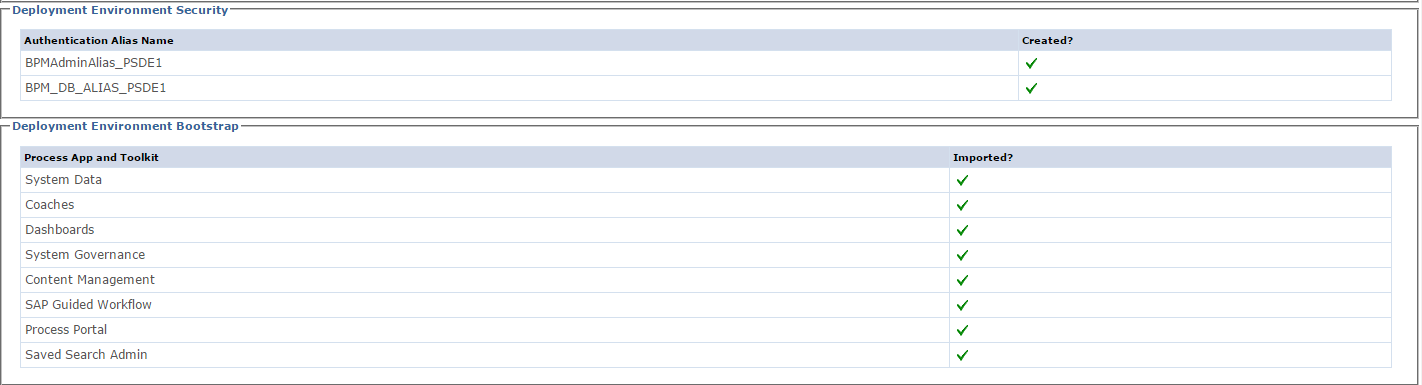
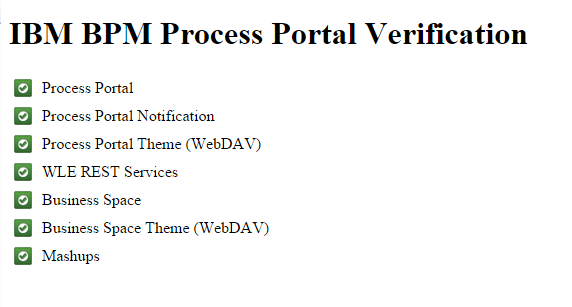
Status of deployment environment
Setting up process server deployment environment
Detailed below are the step by step instructions to install and configure IBM BPM 8.5.6 on windows environment,
Download the following eAssemlbly
eAssembly
|
Image
|
Description
|
CRVC2ML
|
CN4RXML
|
IBM Business Process Manager Advanced V8.5.6 Quick Start Guide
|
CN4RUML
CN4RVML
CN4RWML
|
IBM Business Process Manager Advanced V8.5.6 for Windows, 64-bit, Multilingual
Make sure that you download all of the images and extract them to the same location.
Includes:
IBM Business Process Manager Advanced Version 8.5.6
IBM WebSphere Application Server Network Deployment V8.5.5 Fix Pack 5
IBM DB2 Express V10.1.0 Fix Pack 1
|
eAssembly contains the following 3 zip archives
BPM_Adv_V856_Windows_1_of_3.zip
BPM_Adv_V856_Windows_2_of_3.zip
BPM_Adv_V856_Windows_3_of_3.zip
|
Unzip all 3 zip archives to the same folder, unzipped archive will look like as shown below
Visit the following software product compatibility report portal to determine compatibility among operation system and BPM version and to find the detailed system requirements
BPM 856 will be installed on windows 7 enterprise editions, pasted below is the hardware requirements tab
Make sure your system meet the hardware requirement as detailed below
Report will have other tabs which will have details about supported windows operating systems, Hypervisors, Prerequisites, Supported software, Hardware, Packaging list
Outlined below is the path we'll follow to setup IBM BPM Process Server Deployment environment
Custom installation of IBM BPM
Make sure you have administrator privileges and Start the installation by clicking on 'launchpad64.exe' using option Run as Administrator
Choose custom installation
Make sure you select check box 'install as administrative user'
Click on install button
Upon clicking install button installation manager getting launched
And showing the list of packages will be installed
Click on Next
Upon clicking Next button, installation manager validates the prerequisites and preparing the OS for installation
Further it'll list the fixes/packages that will be installed along with WAS ND
Click on Next and accept the license as we do always
Click on Next button and customize the installation directory as you like
Here I've chosen to install in C:\BPM directory
Select the translation as you need but the downloaded eAssembly should have the language specific files
Click on next button to validate the features selected to install
Here I've chosen to install Business Process Manager Advanced Process Server Non-production License
Click on Next
Enter DB2 administrative user account and password
Click on Next, to list the components will be installed
Click to install
Installation begin
Installation completed and choose None ratio button to close the IM window
Configuring the process server deployment environment using BPM Configuration editor
BPM Configuration editor is located at 'C:\BPM\BPM\config\ui', here "C:\BPM" is the bpm installation folder
Unzip the BPMConfigurationEditor.zip
Open the 'configEditor.ini and enter 'JAVA_HOME' location as shown below
Run the 'configEditor.bat' as administrator from command window
BPM Configuration editor opens in browser window as shown below
Click on browse button to locate the sample property file
Highlight the ' Advanced-PS-SingleCluster-DB2.properties' and open it
Then click on 'Open Editor' button
Click Open Editor to launch the editor and configure the environment.
Editor open it up in Browser
Enter common database details and click on Finish button on top right corner of the window
Enter authentication alias shown below
Enter shared database details as shown below
Enter process server database details as shown below
Enter performance server database details as shown below
Enter Deployment manager details as shown below
Click on summary to list of properties configured
Click on save button to save this file at local directory
File has been saved to local directory
Create SQL statements to generate database
Using BPMConfig utility and the property file we modified using BPM Configuration editor, SQL statements generated to create databases as shown below
BPMConfig command line utility located at bin directory of \BPM_INSTALLATION_ROOT\'
Scripts were generated and stored under C:\BPM\BPM\mydbscripts
As you see there are two set of scripts; one for cell scope and one for deployment environment
Scripts to create common database found under cell scope as well as deployment environment scope
Running any one of the common database scripts is succificient
Run Script to generate Databases
Type the below command in run window to launch windows command prompt as 'db2admin'
runas /noprofile /user:db2admin cmd
|
Remember the SQL scripts to generate databases need to be run under db2admin
You will be asked to enter the password for user db2admin
Enter the password same as the one we provide when DB2 was installed using installation manager
Now the command window runs under user db2admin
Change directory to where the DB scripts are stored and run the createDatabase.bat file to generate the BPMDB database
Batch file create the database
Ignore the DB21034E error, here we're trying to provide authority db2 root user account, hence it's throwing the error.
Note: db2 installation was owned by db2admin and we're using same user account for creating databased for bpm process server deployment environment
Same as run the scripts for CMND and PDWDB
Now with databases created, validate the property file using BPMConfig command line utility
One possible reason could be the batch file used to create database may exit prematurely without completing this statement hence it was failed with DB21034E error code
We'll run these SQL statements separately and validate it again
Launch command windows as user db2 admin using command ' runas /noprofile /user:db2admin cmd' on run window
Navigate to bin directory where DB2 got installed and launch db2 command line processor
And run the SQL statement as shown below
We'll validate the property file using BPMConfig utility again
This time the validation passed successfully
Let's validate the database connection using BPMConfig
DB2 validation successful
Creating Deployment Environment using BPMConfig utility
Now we'll run the BPMConfig utility to create process server deployment environment
Starting the deployment environment
Quick start short cut option available to start the DE
Upon clicking De1 Quick Start option , you will get the following windows
Click on start the process server deployment environment
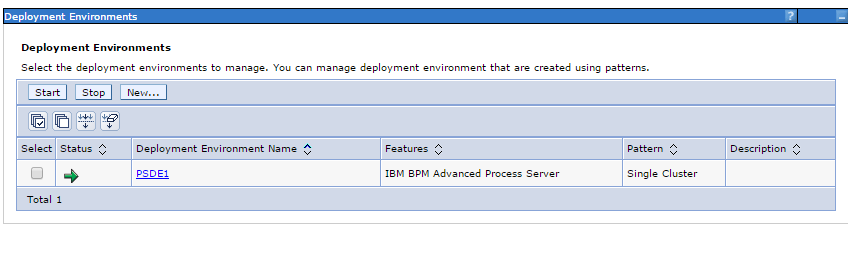
Deployment environment started successfully
Let's login to deployment manager
WAS and BPM version on the home page
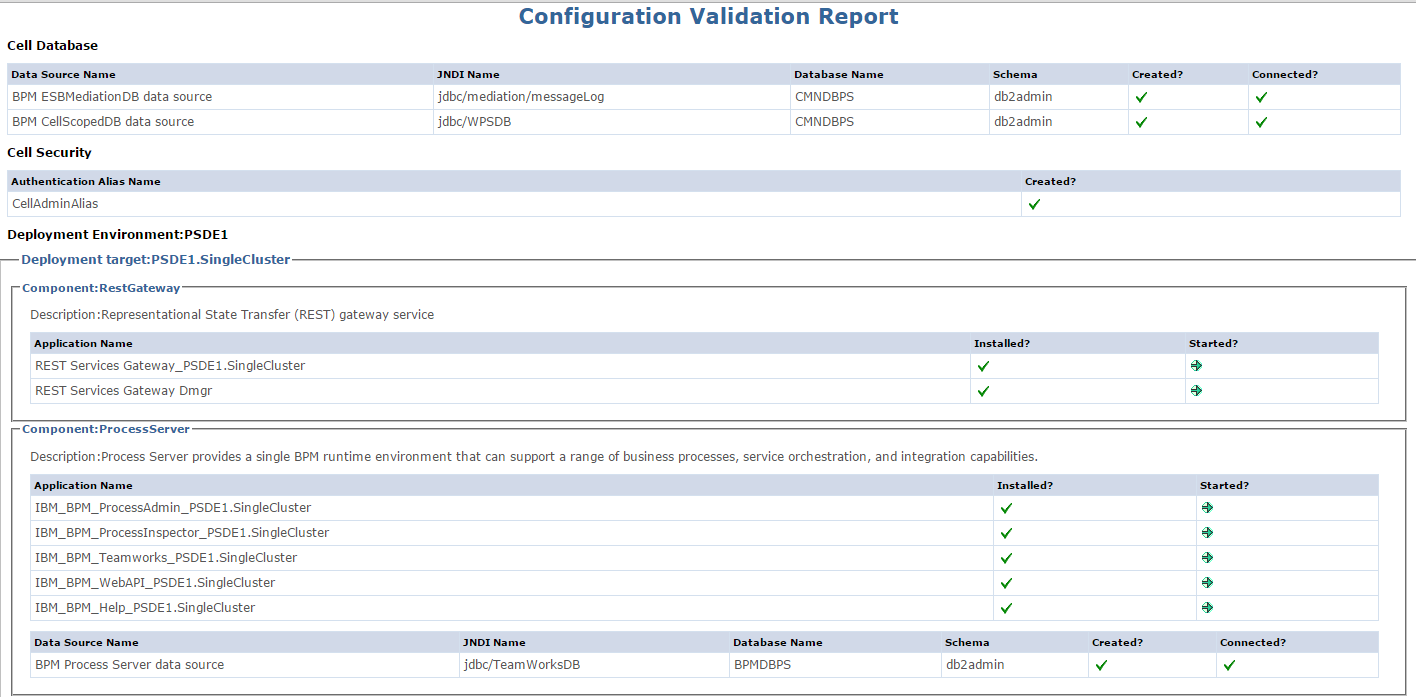
Status of deployment environment